Building your own NAS

Yes, I know. Get a Synology, QNAP, ASUSTOR or any other, right? Well, no. I am fully committed to free open source software whenever I get to choose. This usually makes things more complicated, but I learn a lot more along the way and makes it much more fun.
I mean, for sure: getting an OOTB (out of the box) experience might be good enough for most people, but you won’t get the full banana (context here). You get a fraction of the value and a fraction of the opportunity to learn.
The specs⌗
For the fast readers, lets get the specs out of the way:
- CPU: AMD Ryzen 5600G
- RAM: 2x16GB 3200MHz DDR4 CL16 Kingston FURY (update: now Samsung ECC 3200MHz)
- Motherboard: B550-I Asus ROG Strix (Mini-ITX)
- Cooler: Noctua NH-L9a-AM4
- Drives: 4x4TB Toshiba N300
- Case: NSC-410 by U-NAS
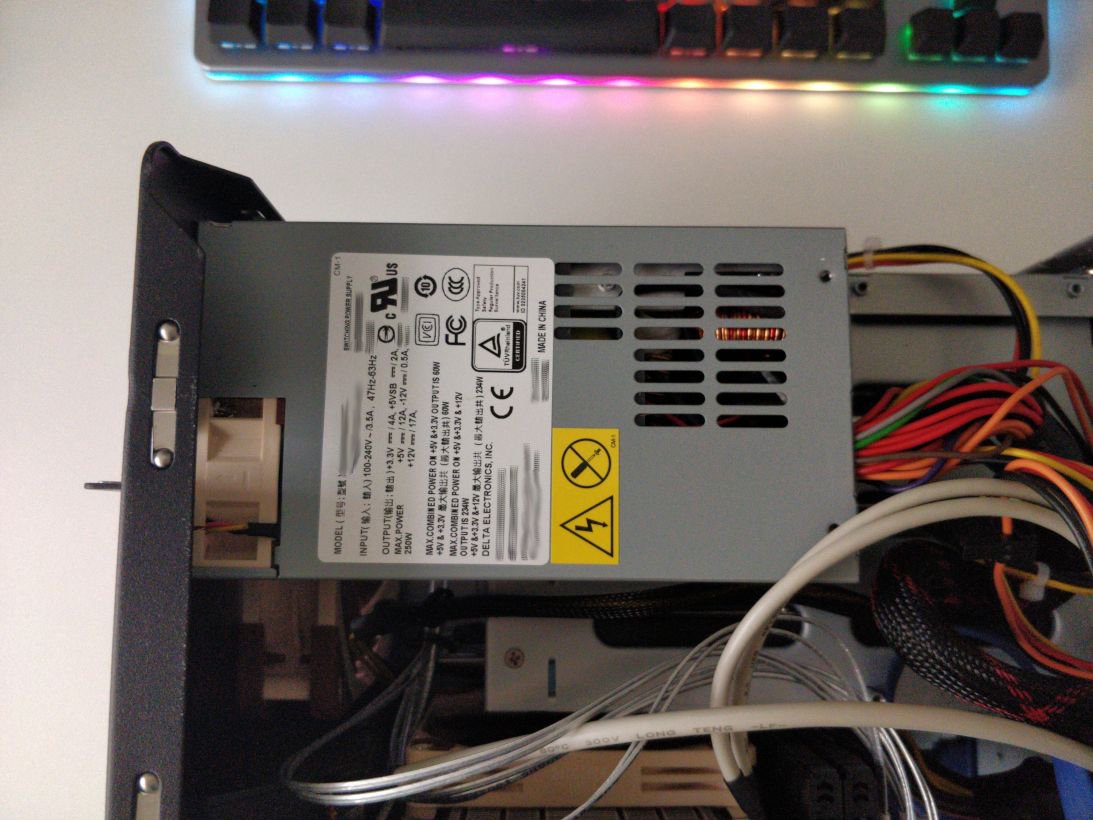
- PSU: 250 watt 1U Flex (fan replaced with Noctua 40x20mm)
The concept⌗
I want this NAS to be a 80% NAS and 20% server. I want it to store all my files, serve my website and all my little microservices that are in a 2GB RAM VPS right now. Hence, I don’t really need anything too powerful.
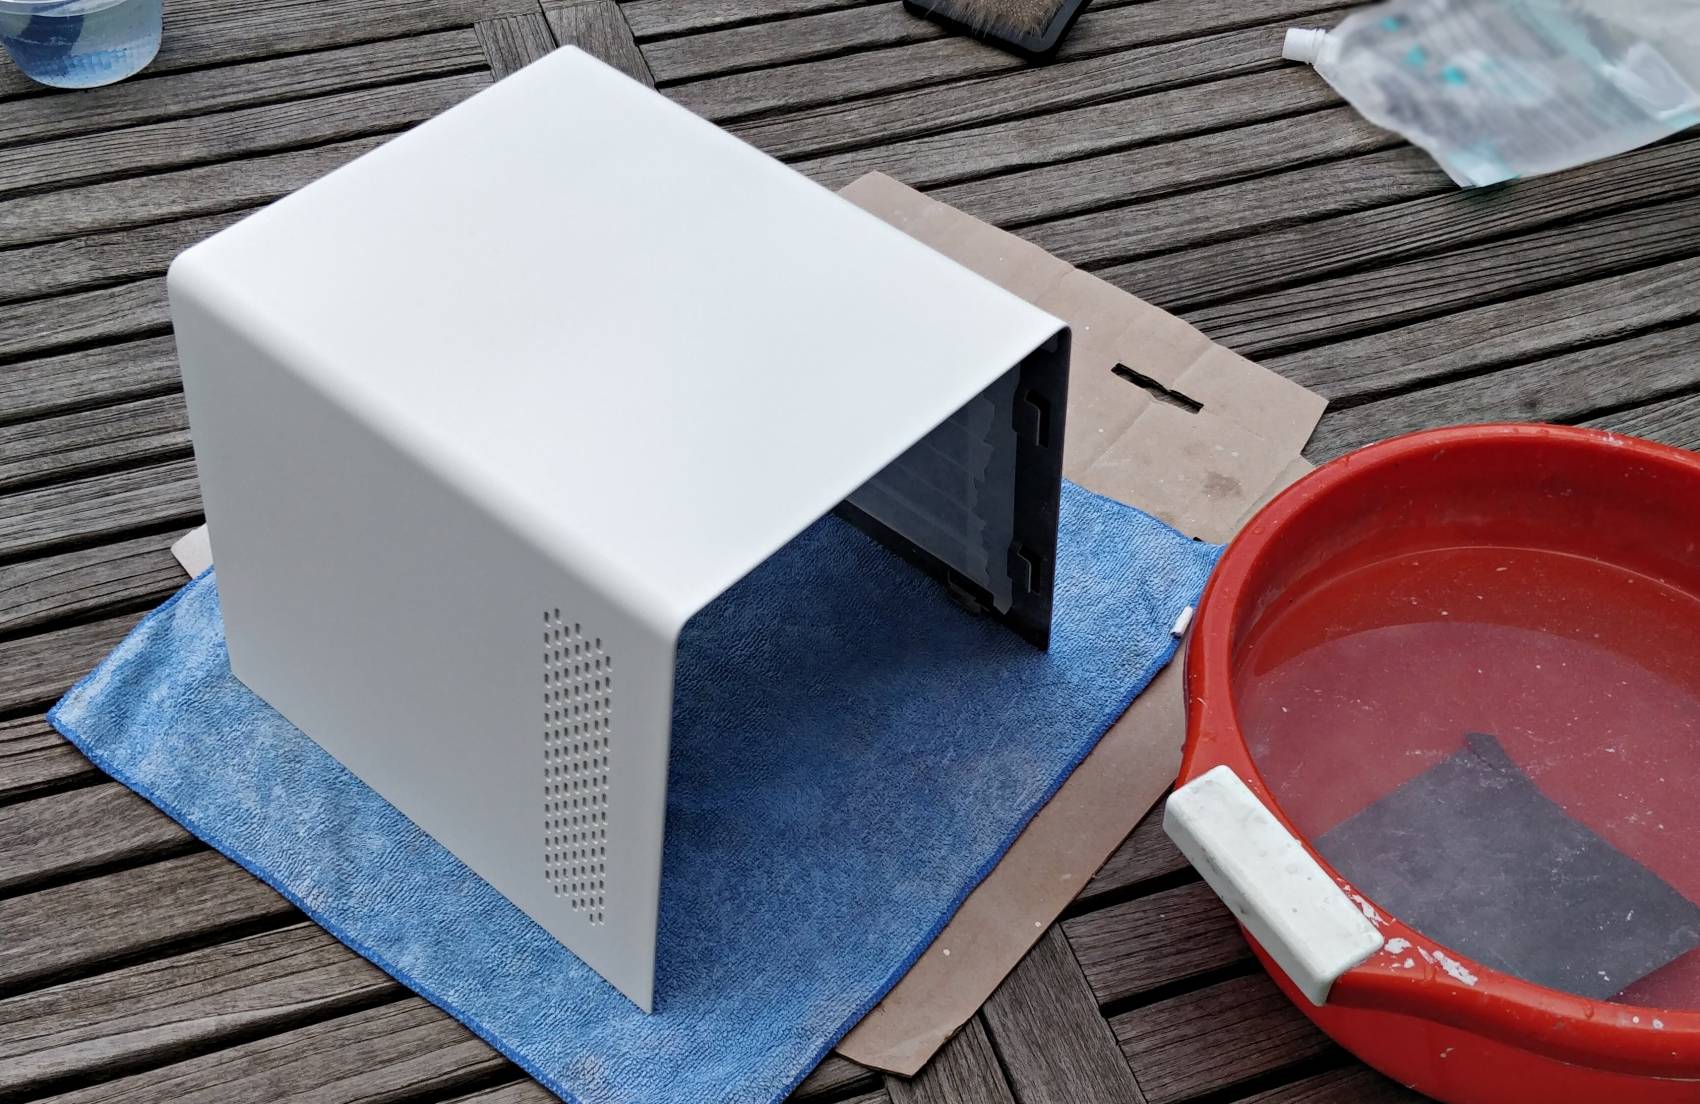
The case⌗
Compact but spacey in the sense of storage. That is something I wanted for sure. Therefore I aimed for 4 drives. I came across U-NAS cases, which allow for compact size, storage options and the ability to fit an entire Micro-ITX PC inside them. They didn’t ship them to my country, but after reaching out to them they were kind enough to ship it here.
Of course an off the shelf case was not going to cut it for me. It didn’t go with my house. So of course I painted it matte white (so the dust wouldn’t show as much).
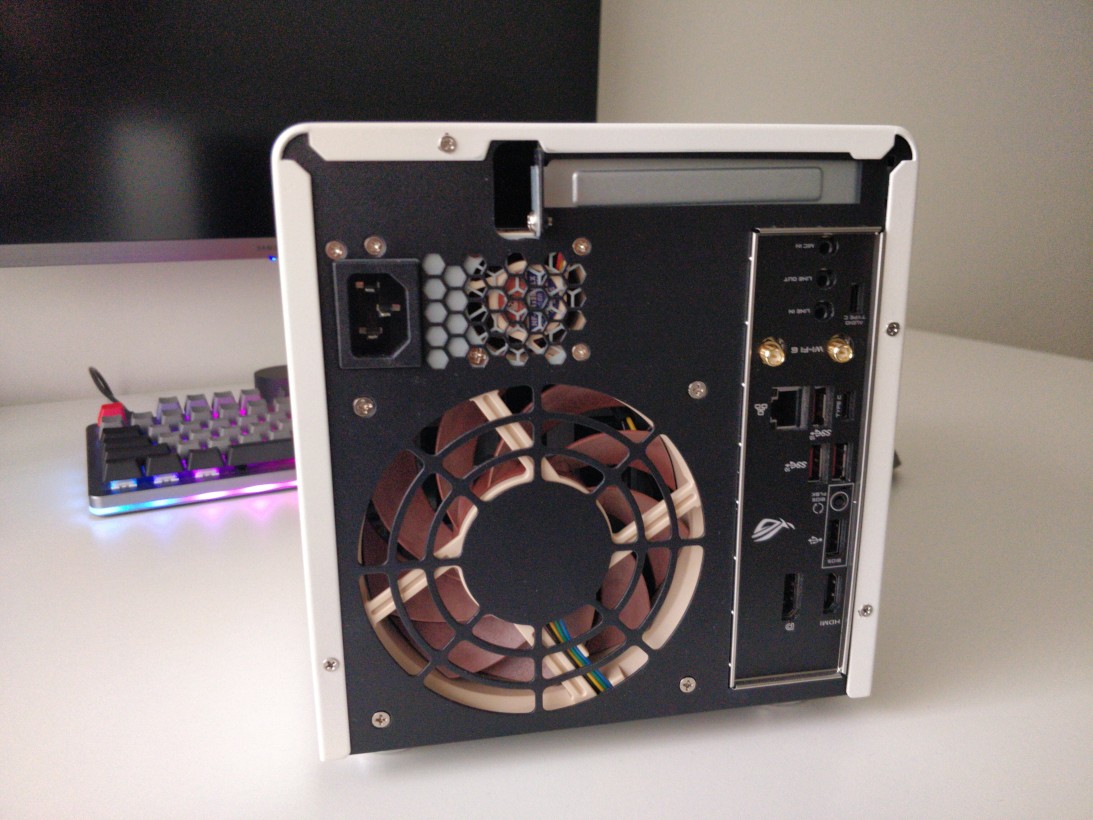
Even though a NAS can’t really be more silent than it drives, this case fans were adding a bit to that noise. The best solution was to replace the 1U flex PSU fan with a Noctua 40x20mm, as well as the main 120mm fan for the drives and chassis case.
Please be very careful when opening up a PSU, since high capacity capacitors could kill you.
Another thing that could make the build quieter is the chassis grill covering the fan. A friend pointed this out to me and showed me this research. Either way I decided not to act upon, since I didn’t feel like taking a drill into the case yet.
The Micro-ITX PC inside it⌗
There were some compromises to be made here, since the case leaves us with literally 4.5 cm clearance from the motherboard itself. The space is more like 5 cm, but lets leave some for airflow’s sake. The RAM and Noctua CPU cooler allow the system to be just as tall as the motherboard I/O; not even 1 mm further.
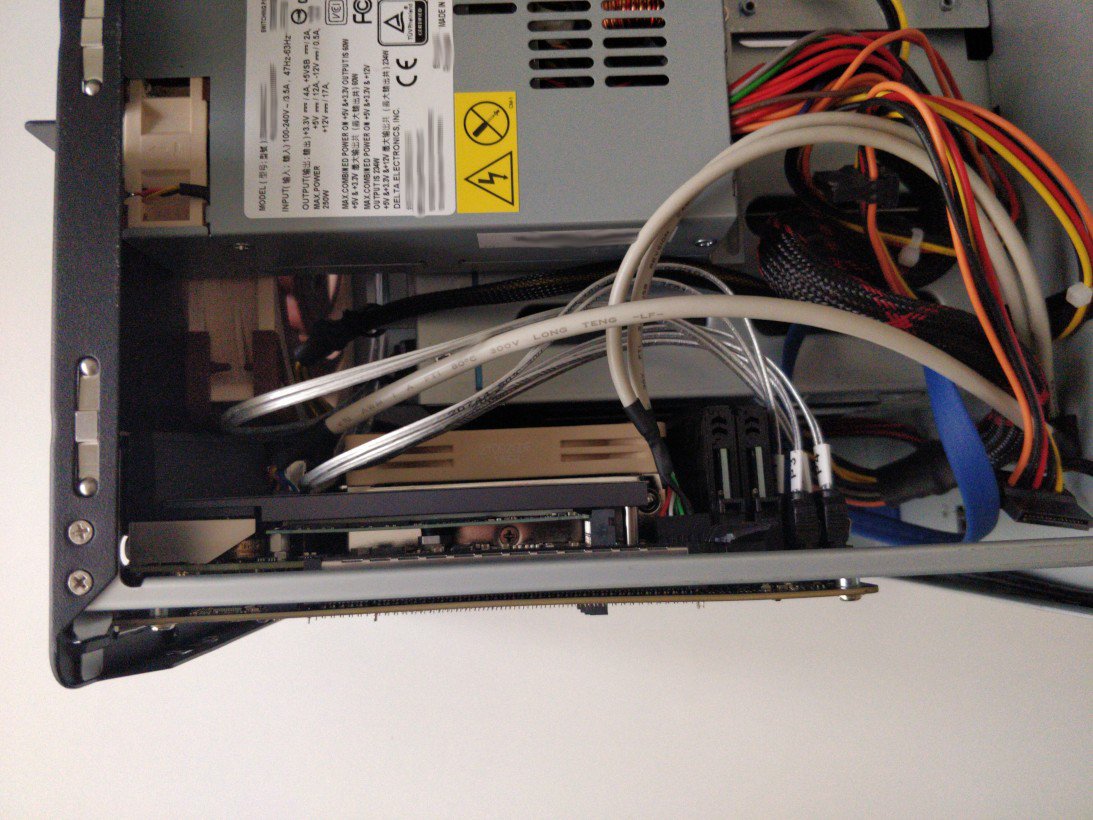
There is an issue I wasn’t really expecting until I assembled the computer. The 250 watt 1U flex PSU (non modular) has only a 4 pin CPU aux connector, while the motherboard expects a 8 pin CPU aux. This means there will only be 2 pairs of cables pumping extra wattage to the CPU. 4 pin should allow up to 100 watt, and my CPU is 65 watt TDP. I have tested stressing the CPU and everything seems stable. Any load peak could take the CPU above 100 watt and crash the system, hopefully with no data loss. A solution to this could be a new 1U flex PSU, but I will keep mine for now.
Another thing to consider is the space and airflow we are working with. I have opted for a 65 watt CPU, but it still may be too much. I will edit this section if I end up undervolting the CPU.
Update (2023-09-01): I have not undervolted the CPU, since it is running stable
at its peak during immich object/face recognition processing.
The drives⌗
Here I won’t give you too much detail, since I took a friend’s word for it. I went with Toshiba N300 drives, based on reliability and nothing else. If there is a priority I have not mentioned until now, it is reliability. And I have not mentioned it because it seems obvious; I mean: it is a NAS. It is supposed to store data and exceed in doing so.
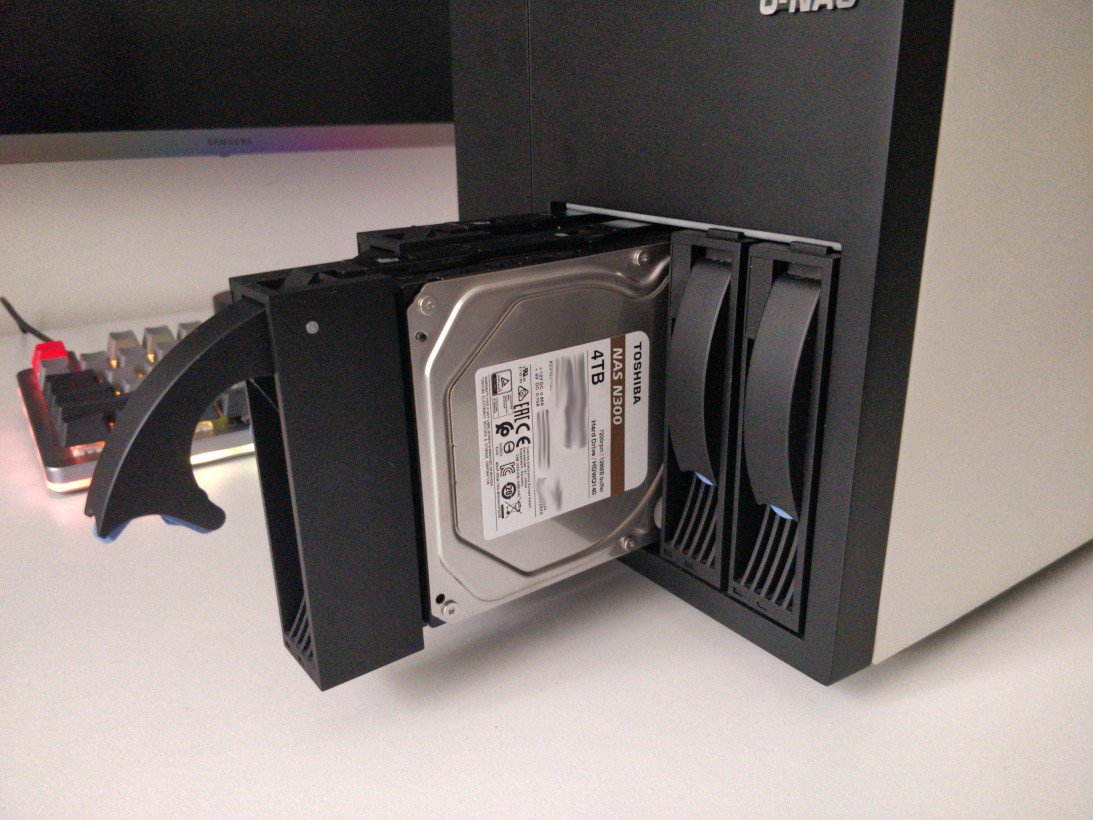
The only downside I found to this drives is how noisy they are when seeking. If you want to recommend any other drives, feel free to drop a comment at the end of this post.
I chose 4TB drives because I consider it to be enough for my first build. In case I need to increase the storage, I won’t have any other choice than increasing TB/drive or upgrade the case (with the help of some SATA PCIe expansion card).
When buying drives, please remember to buy very separated in time, since if you get 4 drives, same brand, same model and same batch number; and then proceed to start using them at the same time, they will very likely start dying at the same time. This increases the risk of irreparable RAID failure, leading to data loss.
I will also mention there are 2 M2 SSD drive slots on the motherboard, as well as 3 2.5 inches HDD slots on the case (non hot swappable). This can be useful to store data which needs no redundancy, like movies, music and others.
The OS⌗
Of course I went with debian. Stable, reliable, trustworthy old debian. Just a clean base to build upon.
RAID⌗
RAID stands for Redundant Array of Inexpensive Disks, allowing to have data reliability with redundancy and cheap drives. There are a ton of articles already covering RAID, so I will take for granted your understanding on the RAID setups.
Keeping up with reliability, I find the best compromise between useful storage and data reliability to be in 2/4 drives able to fail with no data loss whatsoever. Thus, RAID 10 was not going to cut it, since it allows 2/4 drives to fail if you are lucky enough. I don’t like having luck into the equation. RAID 5 only allows for 1 drive failure with only 1 parity drive. RAID 6, as a counterpart, has 2 parity drives (one P and one Q, actually), therefore allowing for 2 drive failures at once.
Writing speeds takes a hit on RAID 6, since it needs to calculate P and Q, writing those into each disk after the calculation takes place. It also needs CPU cycles before writing. This is no problem in my book, but your mileage may differ. Also, I will walk you through some workarounds in the FS section.
File System⌗
After some research, I didn’t really have too many choices. btrfs was my go to,
since I know a few people running it successfully. But there I went on my research
and found this
very disencouraging disclaimer:
There are some implementation and design deficiencies that make it unreliable for some corner cases and the feature should not be used in production, only for evaluation or testing. The power failure safety for metadata with
RAID56is not 100%.
So here I went with OpenZFS, a FOSS implementation of zfs. The core concepts
differ from your usual, appearing concepts such as device, vdev, zpool and others.
I won’t cover zfs in this post, but RAID 6 equivalent would be RAIDz2. There
are RAIDz{1-3} depending on the parity blocks to be calculated. If N > {1-3}
devices fail, it will take the entire zpool down.
Here comes the workaround I mentioned above regarding write speeds. zfs allows
for cache devices (log and special are also available vdev classes). This means
the most accessed files on the pool will remain cached on the 1TB M2 SSD I mentioned
in the disks section.
Modern zpools won’t be taken down on a special class vdev failure, but it could happen,
so keep it in mind and add redundancy if needed. Normally cache data is dirty and
not really related to data loss, but your mileage may vary here.
Updates (2026-04-06)⌗
I have been running this NAS for a +4 years now, and I am very happy with it.
I have added an Intel Arc GPU A310 to it, which is working great for
hardware acceleration and transcoding on immich and frigate.
For ventilation purposes, I took the Dremel to the case
and cut out a square where the GPU fan is, where I placed a 3d printed grill.
I switched the RAM to Samsung ECC 3200MHz, which is working great and has been running for a couple years now with no issues.
Finally, I added a DAS (Direct Attached Storage) to it,
as I did not want to lose the graphics card nor a NVMe slot.
I went for the TERRAMASTER D4-320 which is plug and play 4 bay USB 3.2 enclosure.
This is working great for backups and extra storage,
and is controlled by the NAS itself, so it can be used for zfs pools as well.
As for the drives, I have had no issues with the Toshiba N300, and even added more to the new DAS.
Thoughts?⌗
This post is tagged with the opinion tag, and therefore it is based on my
experience and knowledge. I am more than open to hear your opinions, corrections
of my gained concepts and any other comment.